Tutorial Intro
PxlBench is an AI image editing toolkit. It is completely free to sign up and use. Our goal is to provide an easy to use interface to transform and create stunning visual content. This guide serves as a brief introduction to our most popular tools. We will cover how to generate new images, make targeted edits with AI to transform images, use AI to create variations of images and remove backgrounds.
This is a short guide intended to help you get familiar with the tools offered so you can get up and running creating the images you want. The best way to learn is by experimenting and using the tool.
The Tools We Offer
We offer a range of tools to make creating and transforming images as simple as possible. Our tools include:
- Text to image generation.
- Support for multiple image generation models to help you get the best results.
- Image to image generation.
- Using an existing image as an input, you can generate variations of existing images. Changing the style, colors, lighting, and subjects are just some of the possibilies with this tool
- One click background remover.
- Easily remove the background from any image with a single click.
- Magic eraser.
- The magic eraser tool can fill in parts of an image with the background making it easy to remove anything from any image.
- Image segmentation.
- Similar to the background tool, this tool let's you select specific parts of an image and extract them as a new image.
- Image inpainting.
- Inpainting is useful for changing only a specific part of an image.
- Merge tool.
- The PxlBench platform allows you to combine multiple images into a single image for either exporting or further editing.
These tools contain a lot of power and flexibility when it comes to editing or creating images. Depending on the use case, you might find yourself using a combination of these tools to get the desired results.
The PxlBench Interface
The PxlBench interface is essentially a large canvas and an overlay of different panels to manage user accounts, canvas layers, and tools.
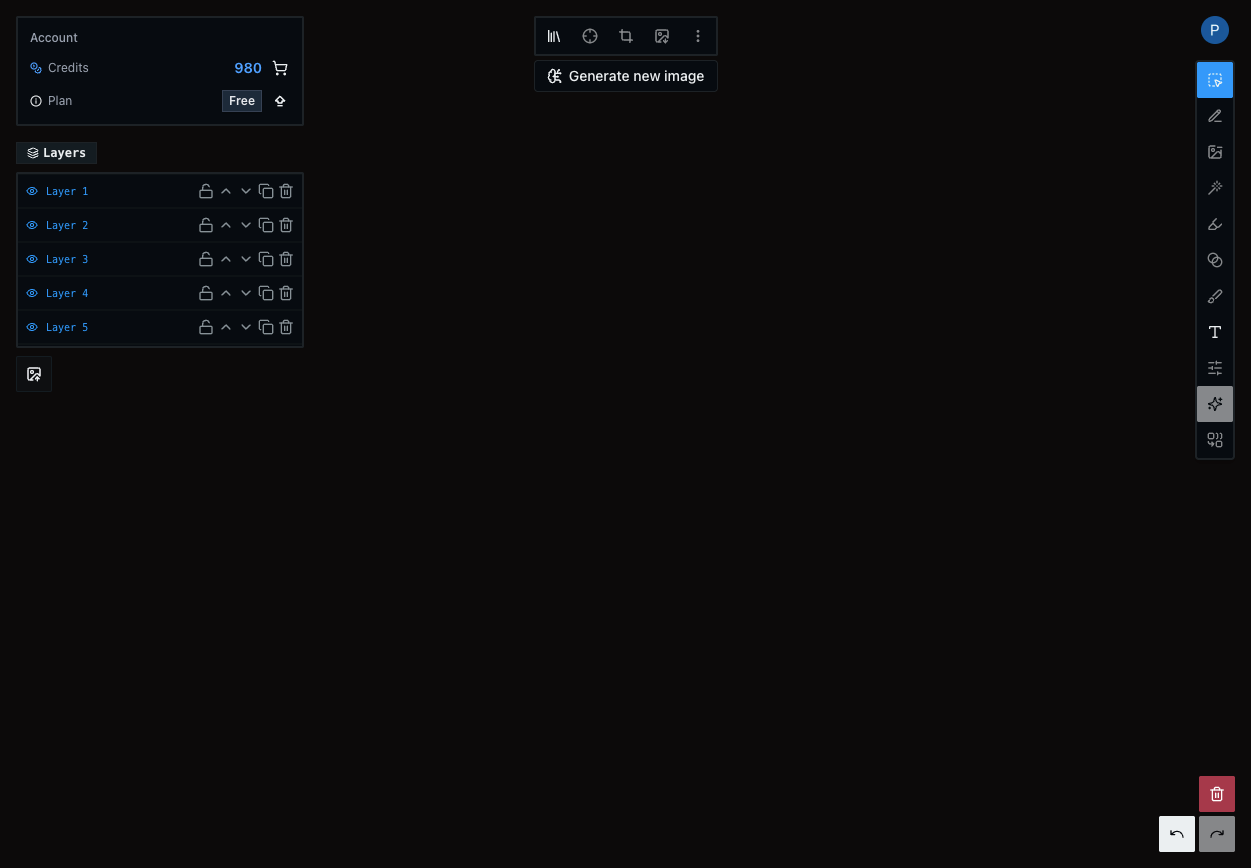
The left top panel is the user management panel. Here you will see your subscription status as well as your credit balance.
Directly under the user management panel the layer panel can be found. The layer panel enables selecting images as well as some other common layer operations you might need.
Directly under the layer panel is the image upload button. Images can be dragged and dropped directly on the canvas but if you prefer to search files to upload an image it can be done with this button.
In the top middle of the interface is the first toolbar. This toolbar contains utilities such as image export, crop images, center canvas to image, duplicate layer, mirror layer, and change layer order.
Under the utility toolbar is the 'Generate new image' button. Clicking this will pull up a modal.

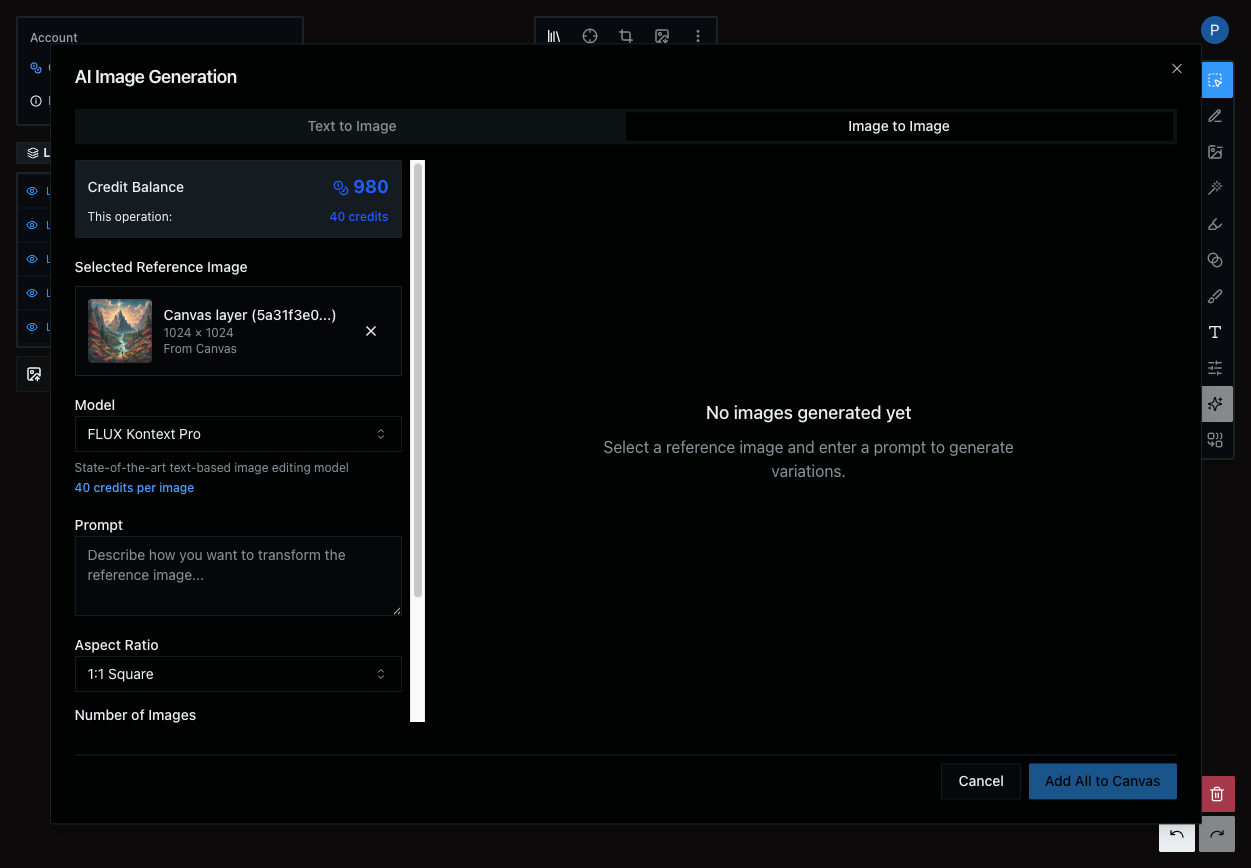
This modal contains two different options. Text to image generation and image to image generation.
Text to image allows you to generate new images from text. There are multiple models to choose from to generate a variety of images in the style you want.
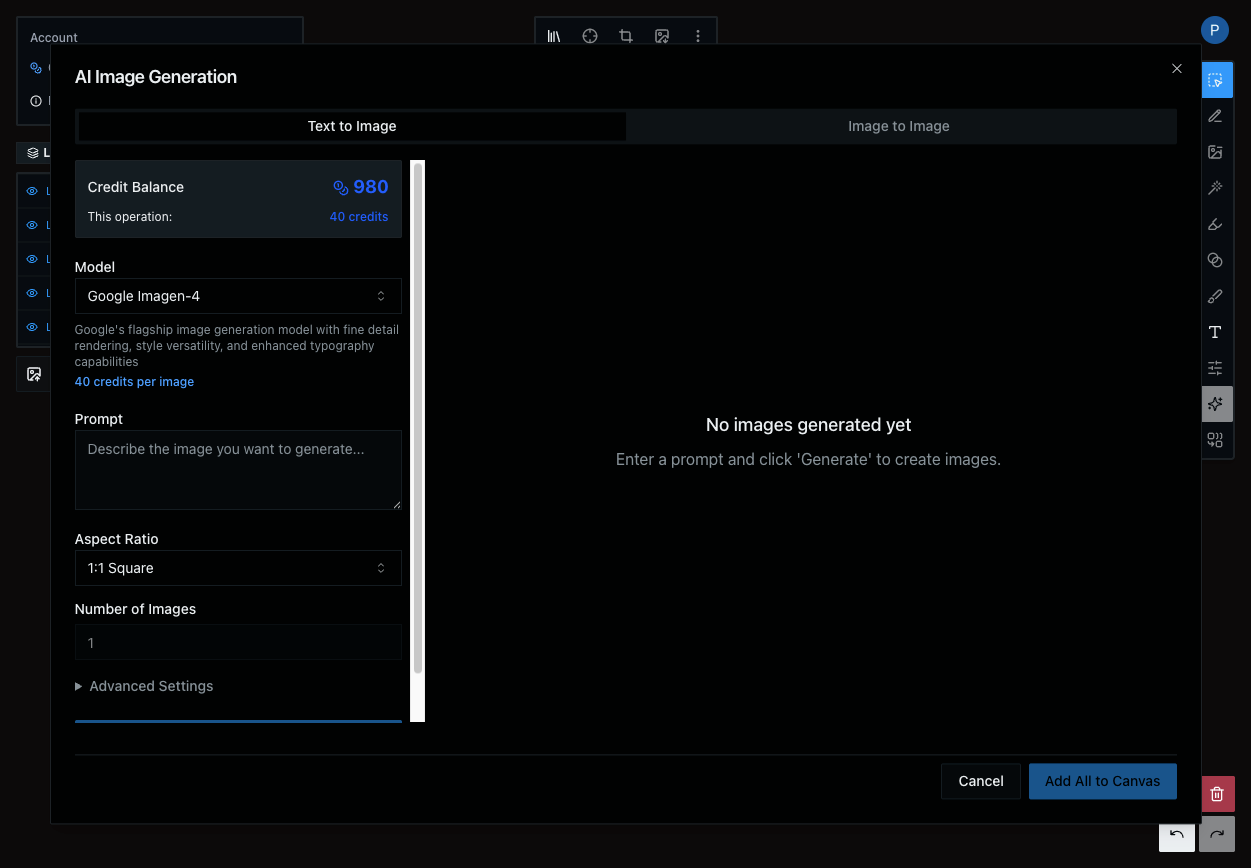
Image to image requires you to use an existing image to generate variations. You can either drag and drop an image to the reference image upload box or select an image from the canvas.
Main Tools Panel
The right panel contains all the different tools. Hovering over the buttons provides a tooltip that describes the tool. We will briefly cover each tool here.
The first tool is the select tool. This allows you to select, drag, resize and rotate images in the canvas.
Under the select tool is a powerful tool to make edits to images with text. Simply select an image, click the 'Edit with AI' button

This pulls up a text box allowing you to describe the edits to make to the selected image.
Next is the one click background remover.

If an image is currently selected, clicking this will begin the background removal process. This takes a couple seconds but when it completes the image with the background removed will be added to the canvas.
The segment tool allows you to select specific parts of an image and extract them as a new image.
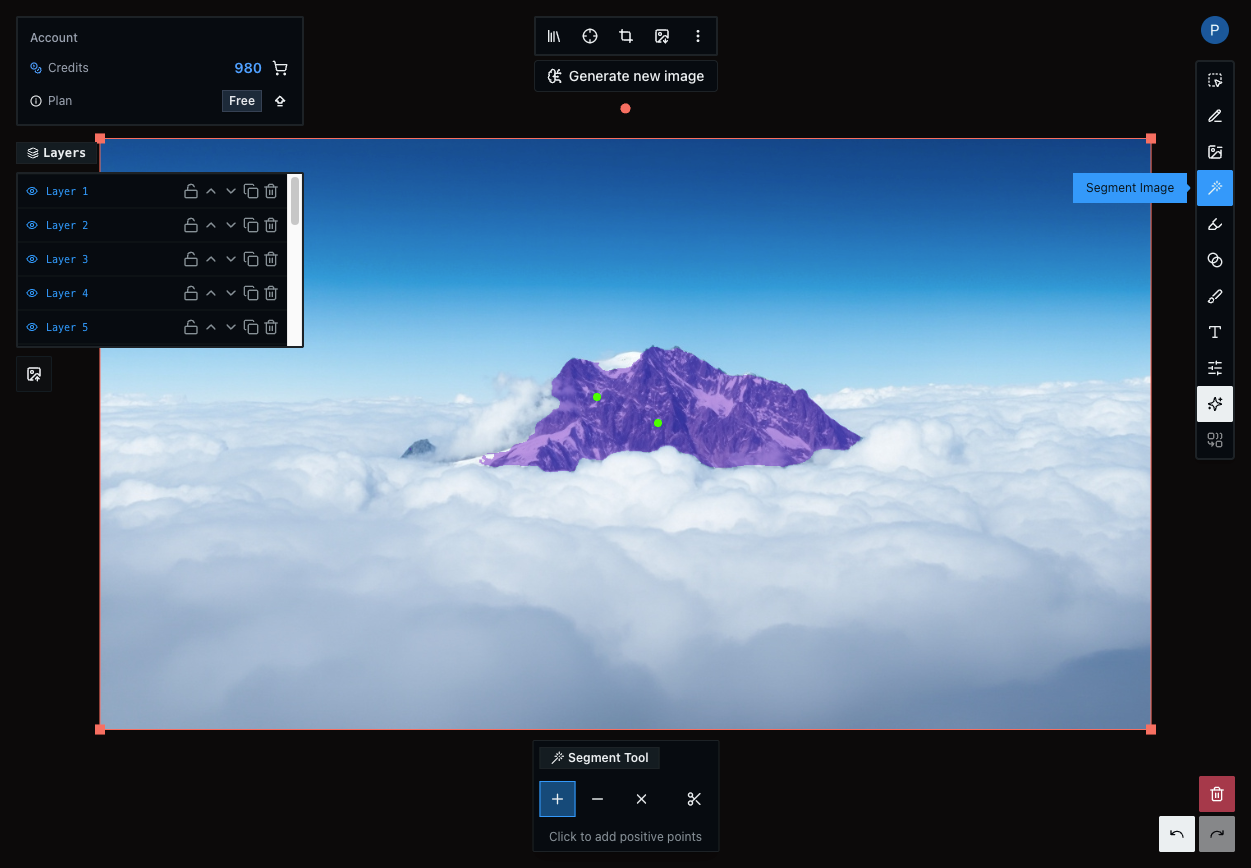
You can place positive or negative points and as many of each as you want. Positive points are for areas you want to select while negative points are areas to not select.
You will see the current selected area as a purple overlay on the image. Typically, fewer points work better than many points.
Next we have the mask tool.
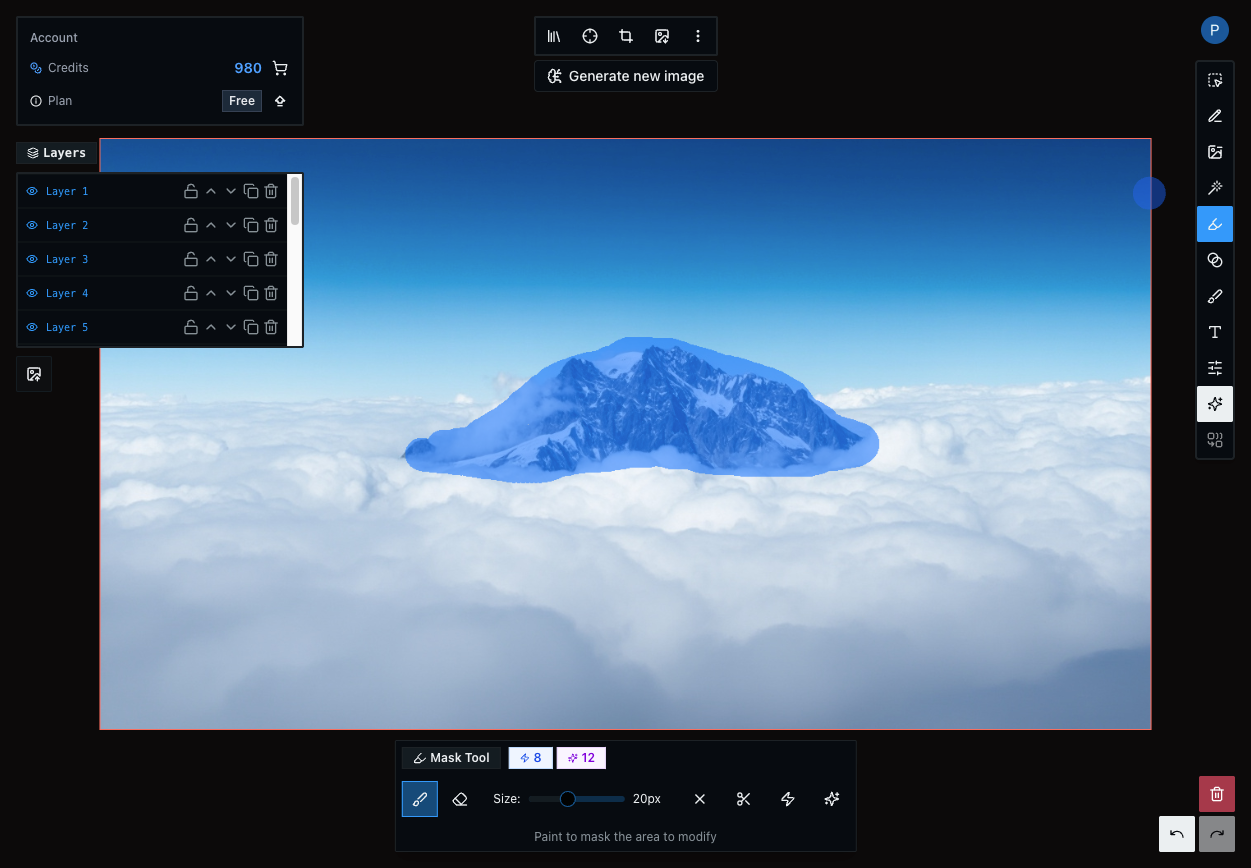
This is similar to the segment tool in that it allows you to select pieces of an image but it is enhanced with a few options for intelligent edits.
Simply draw an area on the image to select. This is displayed as a blue overlay. When you have your selection there are a few options.
The 'AI-powered removal' tool will fill in the masked area with the background, effectively 'erasing' whatever was there before.
The 'AI-powered generation' tool allows you to describe what to replace the masked area with.
The mask does not need to be super precise to get good results, simply draw a rough area covering what you want to edit.
This tool is useful because only pixels selected in the drawn mask area will be changed, the areas outside the masked area will remain the same.
Conclusion
This guide is only intended to provide an overview of some of the features available to get you started. The best way to learn is by doing. The platform is entirely free to sign up and get started so you can explore how everything works without a credit card. Simply create an account and get started!
In the future this documentation website will provide more practical guides on the strengths and capabilities of each tool.
If you have any questions, email us at [email protected].